Gravel biking – adventures on gravel and forest paths
Your guide to equipment, technology and bikepacking
Gravel cycling combines road bike efficiency with off-road capability. This guide shows you everything about choosing the right bike, off-road riding techniques, route planning, and the world of gravel racing and bikepacking adventures.
Gravel biking is more than just cycling – it's freedom, adventure, and discovery. With a gravel bike, you leave the asphalt behind and open yourself up to a world of gravel roads, forest trails, and secluded country lanes. It's the perfect fusion of road bike efficiency and off-road capability.
The gravel scene is booming worldwide. What began as a niche has become one of the fastest-growing cycling disciplines. Its appeal lies in its versatility: one bike for everything – from commuting to Sunday rides to multi-day bikepacking adventures.
What is gravel biking?
Gravel cycling combines elements of various cycling disciplines: the speed and efficiency of road cycling, the off-road capability of mountain biking, the endurance of long-distance riding, and the adventurous spirit of bikepacking. The result: a sport that pushes boundaries – literally and figuratively.
The gravel philosophy
Unlike road cycling, gravel riding is often less about speed records and power output, and more about the experience: discovering new routes, enjoying nature, overcoming challenges, and experiencing camaraderie. This doesn't exclude competition – gravel races are spectacular and demanding. But at its core, it's about the adventure.
The gravel bike – anatomy of an all-rounder
The gravel bike is designed for versatility – a compromise in the best sense.
Frame
Materials: Carbon (lightweight, dampens vibrations), aluminum (robust, affordable), steel (comfortable, durable), titanium (premium, long-lasting). Geometry: Longer wheelbase than a road bike = more stable. Higher bottom bracket = more ground clearance. Shorter top tube = more upright position, better for long days. Mounting points: For fenders, racks, and additional bottle cages – bikepacking-ready.
Tires and wheels
The main difference compared to a road bike: Wider tires: 35-50mm (road bike: 25-32mm). More grip on loose surfaces. Better damping on rough terrain. Tread pattern: Depending on the surface – from almost slick to knobby. Tubeless: Standard for gravel bikes – fewer punctures, lower pressure possible. Wheel size: 700c (standard) or 650b (for even wider tires).
drive
Versatile gearing is needed: 2x (two chainrings): More range, proven technology. 1x (one chainring): Simpler, lighter, less to break. Large cassette (10-50 or similar) for steep climbs. Drivetrain: Shimano GRX, SRAM Rival/Force AXS – gravel-specific.
brakes
Disc brakes are standard on gravel bikes: better braking performance in wet and muddy conditions. More tire clearance. Hydraulic (more power, better modulation) or mechanical (easier to maintain on the road).
Off-road driving technique
Gravel riding requires different skills than pure road riding. On loose surfaces, the rules change.
Basic position
Relaxed posture: Loose grip on the handlebars, no tense shoulders. Elbows slightly bent – they act as shock absorbers. Look ahead: Look further ahead than you would on the road. Register obstacles, but focus on your line.
Braking on loose surfaces
Use careful braking: Locking wheels mean loss of control. Apply more rear brake than on asphalt. Brake before curves, not in curves. On downhill slopes: Shift your weight to the rear.
Cornering technique
On gravel: Lean the bike less than on asphalt. Outside pedal down, weight on it. On loose surfaces: Reduce speed before the corner. Drifting is sometimes unavoidable – stay relaxed!
Obstacles
Roots and stones: Adjust your speed and drive smoothly over the obstacle. Puddles and mud: Drive through them, don't swerve (often the edge is worse). Ruts: Cross them at the correct angle, don't drive parallel to them.
Departures
Shift your weight back. Keep your fingers on the brakes, but don't brake constantly. On very steep descents: lower the saddle (dropper post!). Plan your line – correcting on loose surfaces is difficult.
Training for gravel riding – developing versatility
Gravel training combines endurance with technical skills and specific strength.
Aerobic base
As with any endurance sport, Zone 2 training is the foundation. Long rides (3-6 hours) build the necessary endurance for gravel events. Much of this endurance can be trained on the road.
Terrain-specific training
Ride regularly on the surfaces you can expect at events: gravel of varying sizes, forest tracks, dirt roads, and technical singletrack trails (if your event includes them). Train off-road at least 1-2 times per week.
Strength endurance
Gravel riding often requires lower cadences than road riding: sweet spot intervals at 60-70 rpm. Hill repetitions on loose surfaces. Strength training in the gym: squats, deadlifts, core exercises.
Intervals on gravel
Example sessions: 4 x 10 min. tempo/threshold on gravel (5 min. rest). 6 x 3 min. VO2max on varied terrain. Fartlek: Unstructured pace changes depending on the terrain.
Bike handling skills
Separate sessions for technique: practicing cornering on loose surfaces. Braking under different conditions. Overcoming obstacles. Descending slopes of varying gradients.
Gravel racing – From local to legendary
Gravel races are a world of their own – often long, always adventurous, with a special community.
What can you expect?
Distances: From 50 km to 300+ km. Duration: 2 hours to 24+ hours. Terrain: Mix of gravel, asphalt, trails, and dirt roads. Elevation gain: From flat to mountainous. Food and drink: Often self-supported or at checkpoints.
Legendary Events
Unbound Gravel (USA, Kansas): The world's biggest gravel event. 100, 200, 350 miles. Migration Gravel Race (Kenya): Through the Masai Mara, spectacular. Dirty Kanza: The origin, now Unbound. Gravel World Championships: UCI World Championships since 2022. Grinduro: Gravel + Enduro – only certain sections are timed. In Germany: Orbit360, Jeromin Gravel, Rhön Gravel.
Race strategies
Pacing: More conservative than in pure road races – the terrain is unpredictable. Nutrition: Essential for long events. 60-90g of carbohydrates per hour. Checkpoints: Strategy for aid stations. Equipment: Spare inner tube, pump, multi-tool – punctures are more frequent than on the road.
Self-Supported Events
Many gravel events are self-supported: no team vehicles, food from shops along the route, and repairs must be carried out independently. This requires planning and self-sufficiency.
Bikepacking – Multi-day adventures
Bikepacking is the logical extension of the gravel concept: taking your bike into the wilderness, traveling for several days, with everything you need.
What is bikepacking?
Bikepacking differs from traditional bicycle touring: lighter equipment, bags on the frame instead of a rack, off-road capability, and a minimalist approach.
equipment
Bags: Saddlebag (large, for sleeping system). Frame bag (for heavy items). Handlebar bag (for clothing, light items). Top tube bag (for snacks, mobile phone). Sleeping system: Lightweight tent, bivy, or tarp. Sleeping bag and sleeping mat. Clothing: Layers, multifunctional. Food: Dry food, snacks, stove (optional).
planning
Route: Komoot, Bikepacking.com, local resources. Water: Identify sources, bring a filter if necessary. Accommodation: Wild camping (where permitted), campsites, guesthouses. Emergency plan: What if? Phone, power bank, emergency shelter.
well-known routes
Tour Divide (USA): 4,400 km along the Rocky Mountains. Silk Road Mountain Race (Kyrgyzstan): Extreme and spectacular. Torino-Nice Rally (Alps): Across the Alps. Germany: Elbe Sandstone Mountains, Black Forest, Harz Mountains – many local routes.
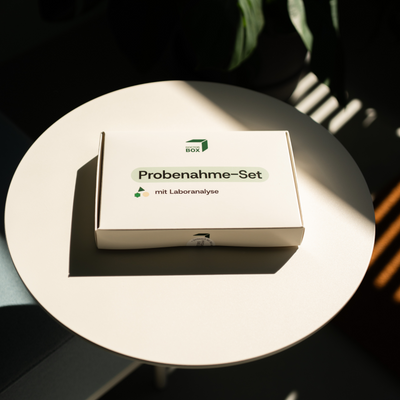
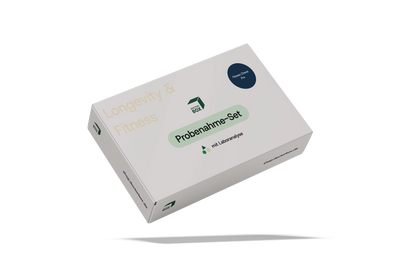
Sicherheit durch Testen
Jetzt wo du die Symptome kennst: Verschaffe dir Klarheit mit einem diskreten Heimtest.
Fitness Check Pro – Your health and performance check for body & heart.
The Fitness Check Pro gives you comprehensive insights into your muscle an...
Analyse im Fachlabor
Diskrete Verpackung
Ergebnis in 72h
Tires and tire pressure – the most important setup factor
Tires are the decisive factor for performance and comfort when riding gravel bikes.
Tire width
35-38mm: Faster on hard surfaces, less comfort. 40-45mm: The all-rounder – good for most conditions. 47-50mm+: Maximum comfort and grip, slower on asphalt. Rule of thumb: As wide as necessary for the surface, as narrow as possible for efficiency.
profile
Slick/Semi-Slick: For firm surfaces, fast, low grip in wet conditions. File Tread: Light tread pattern, versatile. Mixed/Allround: Medium-sized knobs, good compromise. Chunky Tread: For mud and loose terrain, slow on asphalt.
Tubeless
Tubeless is standard for gravel tires: Fewer punctures (sealant seals small holes). Lower pressure is possible (more comfort and grip). Lighter than tires with inner tubes. Setup: Tubeless-ready rims and tires, sealant, valves.
Tire pressure
The correct tire pressure is critical: Too high: harsh ride, bounces over bumps, less grip. Too low: pinch flats, spongy feel, tire roll. Guideline values (varies depending on weight, tire, and surface): 35mm tires: 2.5-3.5 bar. 40mm tires: 2.0-3.0 bar. 45mm+ tires: 1.5-2.5 bar. Experiment! Start with higher pressures and gradually reduce them.
Navigation and route planning
Navigation is essential on unfamiliar gravel roads – you can't rely on road signs here.
Route planning tools
Komoot: Most popular platform, good gravel routing function, community routes. Strava: Heatmaps show where others are riding. RideWithGPS: Powerful planning tools, good GPX exports. Outdooractive: Alternative with good maps. OpenStreetMap: Basis for many apps, often shows the best gravel roads.
The GPS computer
A GPS device with navigation is essential: Garmin Edge, Wahoo ELEMNT, Hammerhead. Upload GPX tracks and follow them. Turn-by-turn directions, rerouting if you get lost. Save maps offline – no cell phone reception in the field.
Route planning
When planning, consider the following: Terrain type: Not every path is rideable. Gradients: Off-road, gradients of 10%+ on loose soil are very strenuous. Water sources: Identify them for long tours. Escape options: Routes back to civilization in case of problems. Weather dependency: Some paths are impassable in the rain.
On site
Study the map: Even with GPS, get a feel for the region. Ask locals: They often know the best routes. Be flexible: Sometimes the planned route isn't passable – have alternatives.
Food and provisions on the go
Gravel rides are often long and remote – nutrition requires more planning than on the road.
The problem
Unlike on the road: No gas stations every 20 km. No cafes along the way. Longer time between food options. You need to carry more.
capacity
Water bottles: At least two 750ml bottles, often more. Additional containers: Hydration bladder in your backpack, extra bottle in your frame bag. Snacks: Take more than you think – gravel riding burns a lot of energy.
What to bring?
Tried-and-tested gravel snacks: Bars (muesli, energy, protein bars). Gels for quick energy. 'Real' food: Sandwiches, bananas, dates. Nuts and dried fruit (calorie-dense). For long rides: Salt tablets or electrolytes to prevent cramps.
Refill on the go
Plan your strategy: Where can you find water? (Fountains, cemeteries, restaurants) Are there any shops along the route? Are there any natural water sources (filters are necessary!)? At events: Use checkpoints, don't skip them.
calorie requirement
Gravel riding burns more calories than road riding (uneven surface, more effort required). 500-800 kcal per hour is realistic. For 6-hour rides: 2,500-4,000 kcal – that's a lot of food!
Breakdowns and repairs off-road
Breakdowns are more frequent off-road – and help is further away. Preparation is everything.
The most common problems
Flat tires/tire damage: It happens even with tubeless setups. Chain problems: Broken, jammed, stiff links. Gears: Misaligned after impacts. Brakes: Worn pads, bent rotors. Spoke breakage: From hard impacts.
What you should bring
Minimum for every ride: Spare inner tube (even for tubeless setups!). Tubeless repair kit (sausages). Tire levers. Mini pump or CO2 cartridges. Multi-tool (with chain tool). Chain lock. For longer/more remote tours, additionally: Second spare inner tube. Spare derailleur hanger. Spoke wrench. Duct tape. Cable ties.
Tubeless repair
For small punctures: Sealant does the job – turn the wheel so the hole faces downwards. For larger punctures: Insert a tubeless tube. For a tear/large puncture: Install a tube.
Use chain riveter
Broken chain: Remove the damaged links. Reassemble the shortened chain using a chain tool. Use a master link. The chain will be shorter – some gears may no longer be usable.
Mental preparation
Breakdowns happen. Stay calm. Proceed systematically. If nothing else works: push or hitchhike.
Häufig gestellte Fragen
A dedicated gravel bike is recommended: wider tire clearance, more stable geometry, and more robust components. A road bike with wide tires (32-35mm) can work for light gravel riding, but it reaches its limits on more technical terrain.
40-45mm is the all-around standard. For faster, firmer trails: 35-38mm. For more technical, loose terrain: 47-50mm. The right width depends on the surface you mainly ride on.
Tubeless = tires without an inner tube, sealed with sealant. Advantages: Fewer punctures (small holes seal themselves), lower pressure possible (more comfort and grip). Virtually standard for gravel riding and highly recommended.
Use apps like Komoot or RideWithGPS. Pay attention to the terrain type (not every path is rideable). Plan escape routes. Mark water sources and food supplies. Load the GPX file onto your GPS computer.
More than you think! At least 1.5 liters of water. 60-90g of carbohydrates per hour. For a 4-hour tour: 4-6 energy bars or equivalent. Plan for opportunities to refuel.
Minimum: Spare inner tube, tubeless kit (sausages), tire levers, mini pump, multi-tool with chain tool, chain lock. For longer tours: Second inner tube, spare derailleur hanger, spoke wrench.
Bikepacking uses lightweight bags on the frame instead of racks. It's more minimalist, off-road capable, and designed for multi-day adventures. Cycle touring is more traditional, with racks, often on asphalt, and with more comfort equipment.
On gravel: Looser grip, look further ahead, brake more cautiously (don't lock up), lean less into corners, shift your weight back on descents. Generally: Ride more relaxed and adaptively.
Yes! Many events offer shorter distances (50-80 km) for beginners. The community is usually relaxed and welcoming. Start with a local event before tackling legendary races.
Lower than on the road! For 40mm tubeless tires: 2.0-3.0 bar (depending on weight and surface). Too high = less grip, less comfort. Too low = pinch flats. Experiment and find your sweet spot.
Bereit für den nächsten Schritt?
Du hast jetzt alle wichtigen Informationen. Sorge für deine Gesundheit mit einem zuverlässigen Heimtest.